
How To Set Up A Cricut Explore Air 2? [Step-by-step Guide]
If you need to set up a Cricut Explore Air 2 but don’t know how to do it, then you have come to the right place. In this article, we will guide you on how to set up a Cricut Explore Air 2 on Windows/ Mac and iOS/Android and help you quickly and easily pair the Cricut Explore Air 2 via Bluetooth.
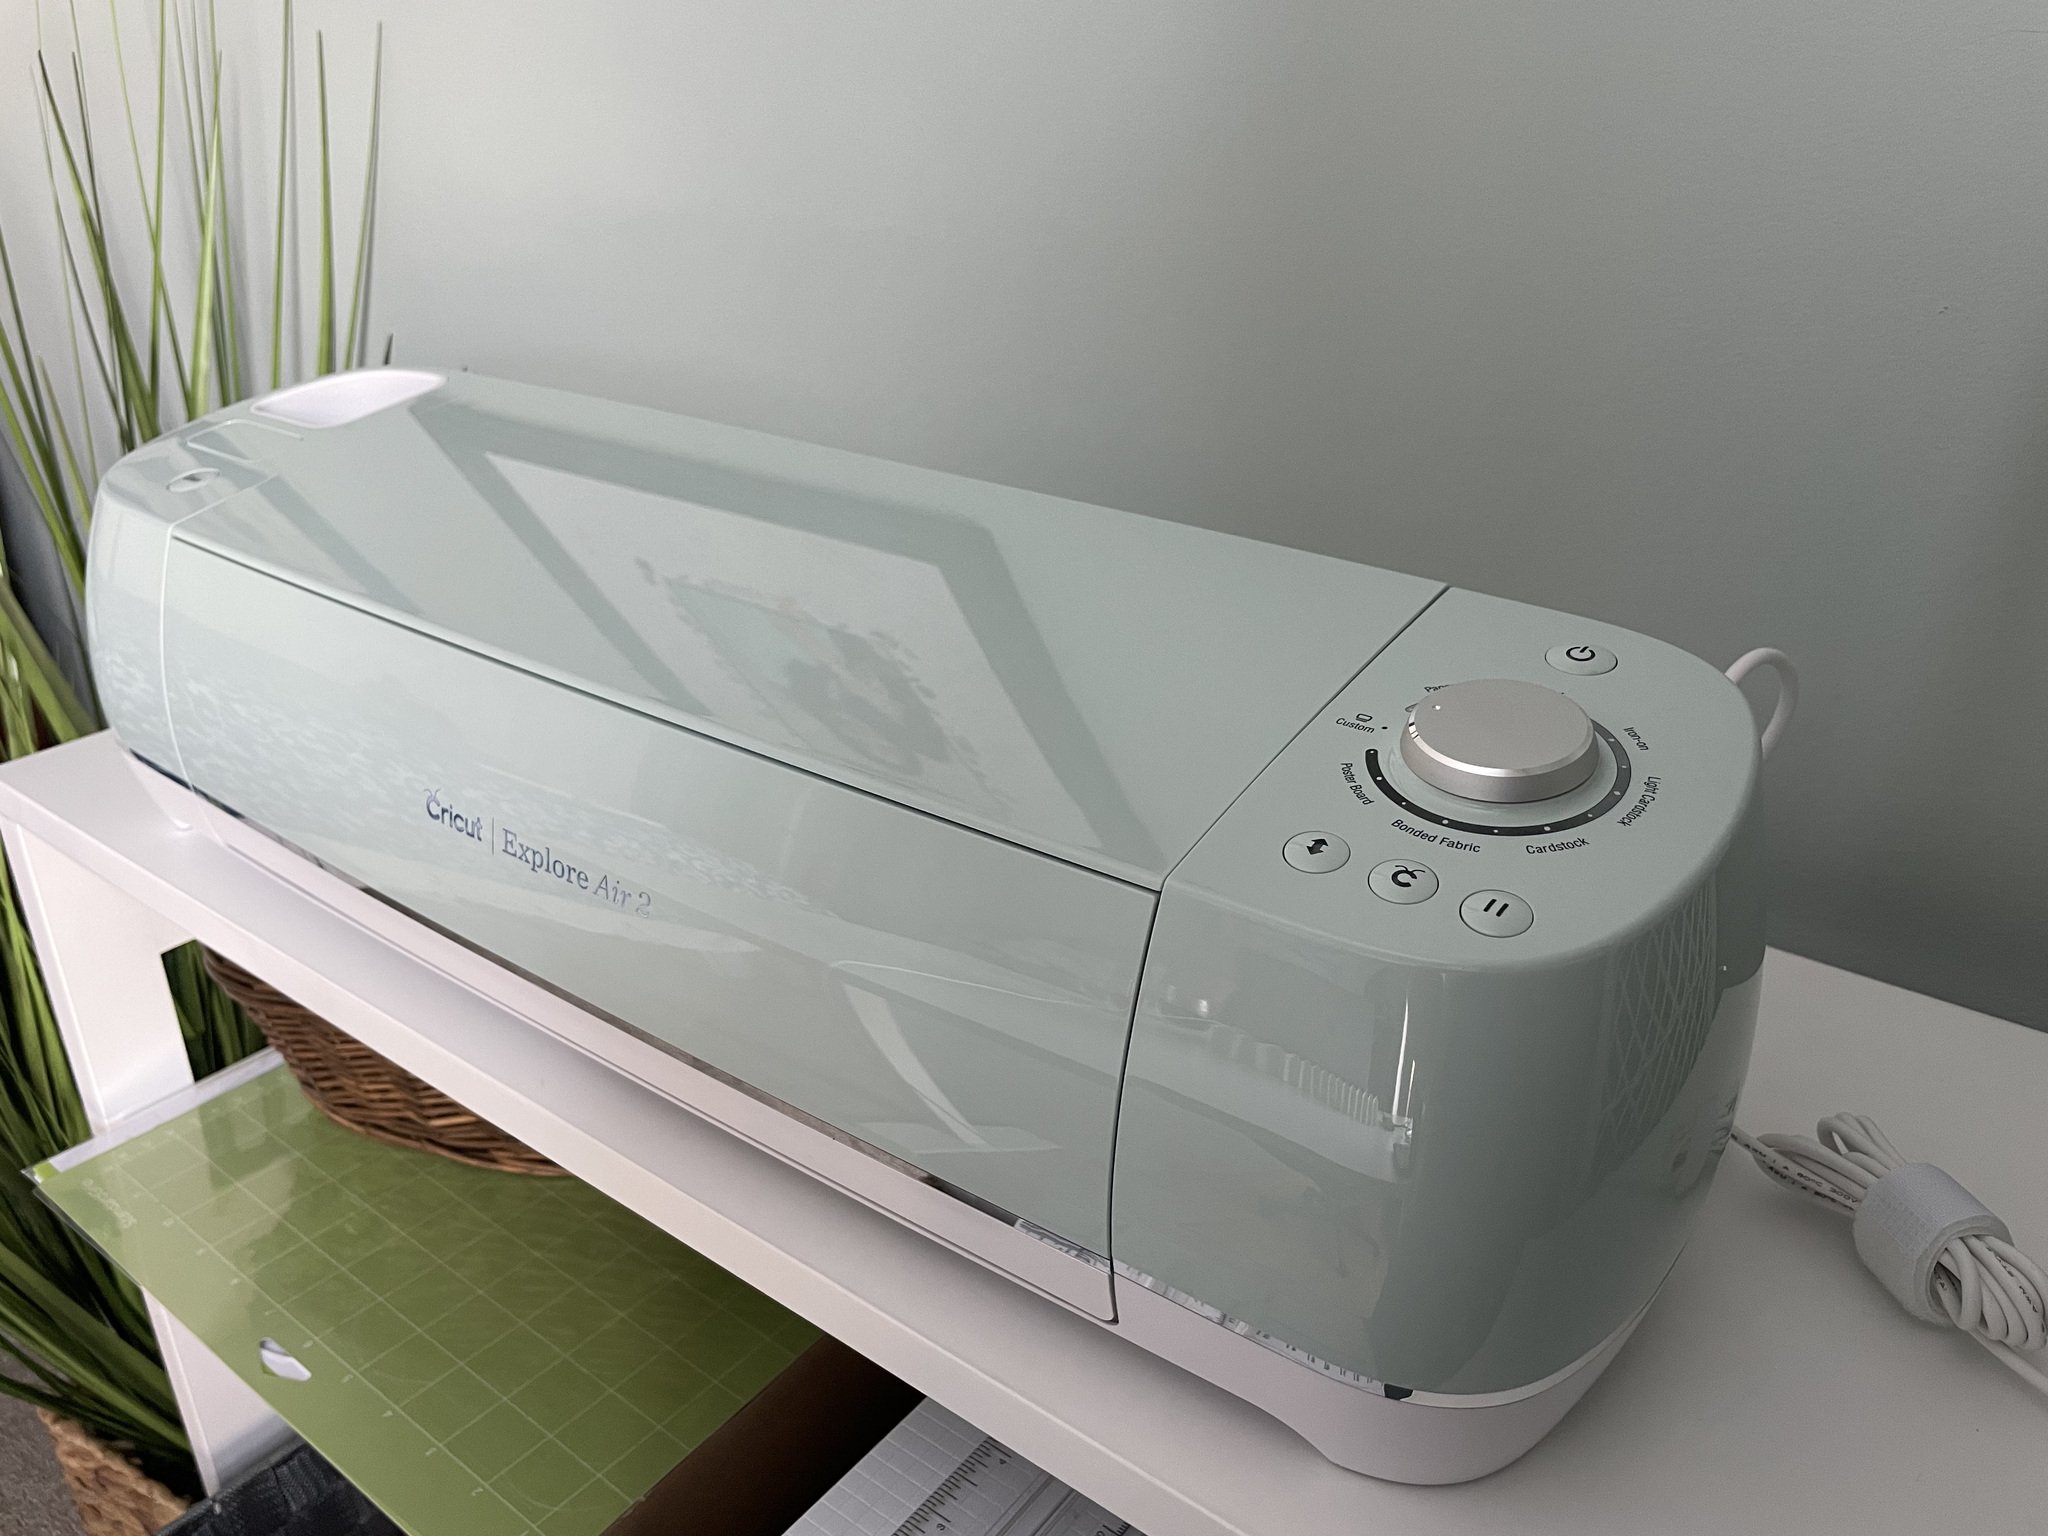
The Cricut Explore Air 2 is a smart cutting machine that lets you cut, write, and score different types of materials to create craft projects. You can choose from over 3,000 pre-designed projects or create your own using the Design Space software. The pre-designed craft projects have all the details you need, including instructions and a supply list. Now, let’s get started with the installation process first.
Installation Steps Of the Cricut Explore Air 2
So before knowing how to set up Explore Air 2, you must learn the installation steps. Below you will learn about the complete method of installation.
- As your initial step, move the machine to where you want to install it.
- After that, take out the Explore Air 2 machine.
- Remove all materials and tapes from your machine.
- You need to connect the wire cables to the machine and the power source port.
- In the next step, hit the Power button to turn on your machine.
- Then, you need to open the Design Space software on your device.
- Now, tap on the Login button. After entering the login details, press the Login button.
- Select the Make It button to start creating a new craft project.
- After that, select from the provided Smart Set dial feature.
- Now, you need to insert the cutting mat into your machine.
- At last, hit the Cricut button and let your cutting machine do the work.
How To Set Up a Cricut Explore Air 2 On Windows/Mac?
To start creating and cutting beautiful projects, you need to set up a Cricut Explore Air 2 on your Windows or Mac computers; follow the basic instructions given below:
- You first need to plug in your Explore Air 2 machine and turn it on.
- Then, connect your machine to a computer using a USB cord or Bluetooth.
- In the next step, navigate to cricut.com/setup in an internet browser window.
- After that, download the Design Space program on your computer.
- Follow the on-screen prompts to sign in, create your Cricut account, and set up your machine.
- When you’re prompted to cut, you’ll know the setup is done.
How To Set Up a Cricut Explore Air 2 On iOS/Android?
If you need to set up a Cricut Explore Air 2 on your iOS or Android devices, follow the easy and simple procedures in the section below:
- As your initial step, plug in your Explore Air 2 machine and turn it on.
- Then, pair an iOS or Android device with your machine via wireless Bluetooth.
- You need to download and install the Design Space program in the next step.
- After that, launch the program, sign in, or create a new Cricut account.
- Now, click on the Menu start button and then choose the Machine Setup option.
- Select your Explore Air 2 machine and follow the on-screen steps to finalize the setup.
- When you’re prompted to perform a cut, you’ll know the setup is accomplished.
How To Pair a Cricut Explore Air 2 Via Bluetooth?
In order to pair a Cricut Explore Air 2 on your computer via Bluetooth, follow the complete directions given below:
- First of all, turn on the Cricut Explore Air 2 machine.
- Ensure your computer and the cutting machine are set within 10-15 feet.
- Be sure that wireless Bluetooth is paired with the Explore Air 2 machine.
- You have to select the Start button in the next step.
- If you need to verify the Bluetooth feature, go to the Device Manager folder.

- If you get wireless Bluetooth, you’ve a Bluetooth-enabled operating system.
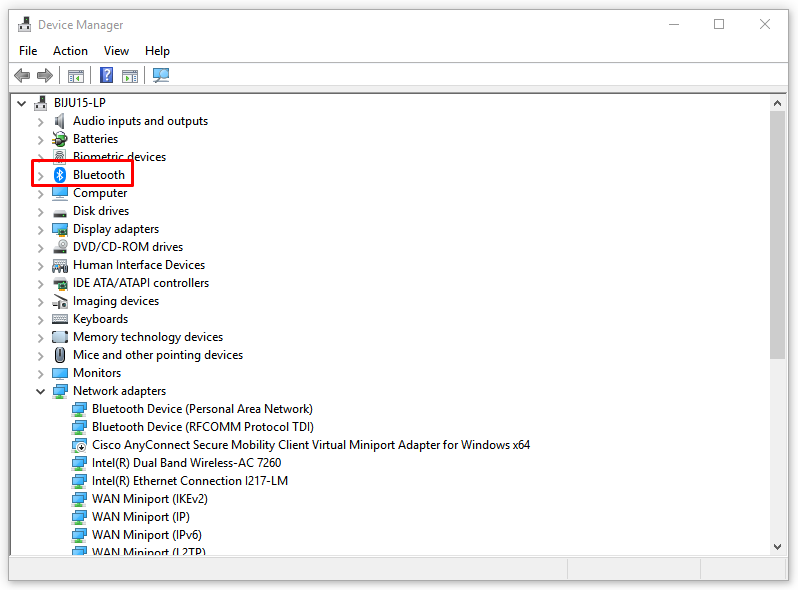
- You’ll need a USB cord if you don’t find a wireless Bluetooth feature.
- In the next step, close the Device Manager section.
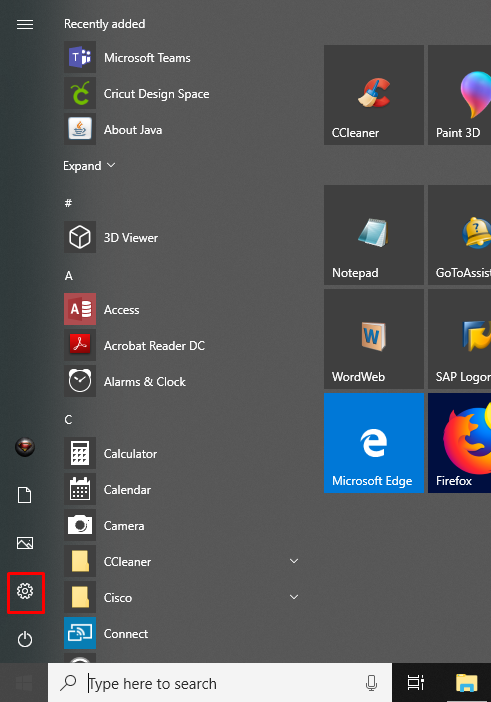
- Hit the Start menu button and then select the Settings tab.
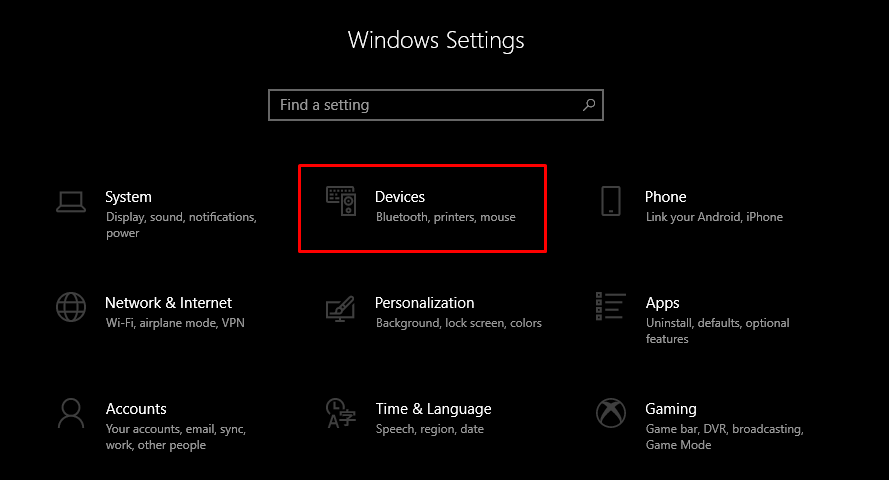
- On your next screen, go to the Devices section in the Settings tab.
- Check if wireless Bluetooth is turned on. And if not, hit “Add Bluetooth or other device.”

- Leave your PC for a few minutes to identify the cutting machine.
- After that, select the Cricut Explore Air 2 machine on the drop-down menu.
- You need to input the “0000” password on the sign-in window screen.

- In the next step, you need to select the Connect button.
- The Cricut Explore Air 2 and your computer are successfully connected.


Comments
Post a Comment