
How To Cut On Silhouette Cameo 4 [Step-By-Step Guide]
The Silhouette Cameo 4 works as a powerful and versatile machine that can cut fabric. The combined rotary blades and ability to cut fabric are exciting features of the Cameo 4 machine. You can learn to cut fabric with it. It is easier to cut fabric with the Cameo 4 rotatory blade, and we will see every step of how to cut on Silhouette Cameo 4.
How To Cut On Silhouette Cameo 4 With/Without Mat?
The Cameo 4 machine consists of three cutting types: regular cut with a mat, kiss cut without a mat, and pop cut without a mat. First, adjust the mat settings. To do so, click the cutting mat dropdown in the page setup window. Select None to choose to cut without a mat. Then, you will have to select the types of matless cutting. While cutting the mat, ensure that the material fits between the rollers of the Cameo 4.
Adjust Cut Settings
- First, click the “Send” tab to edit cut settings.
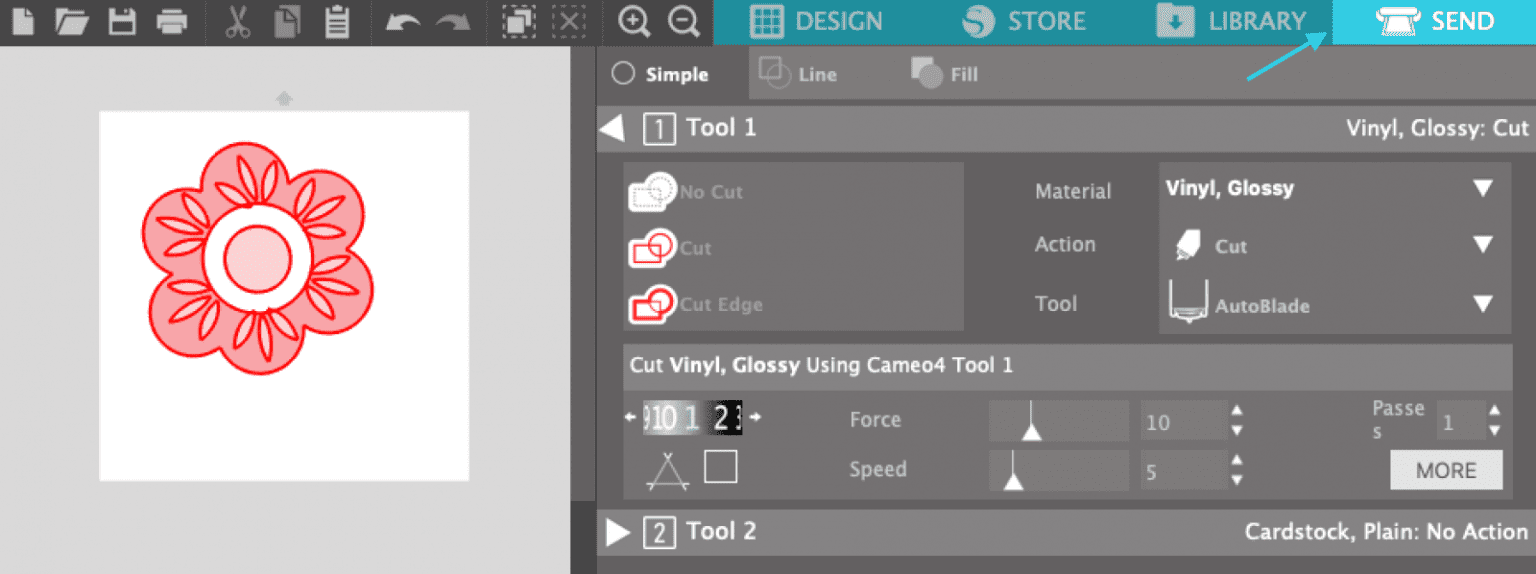
- Then, select the material you have to cut.
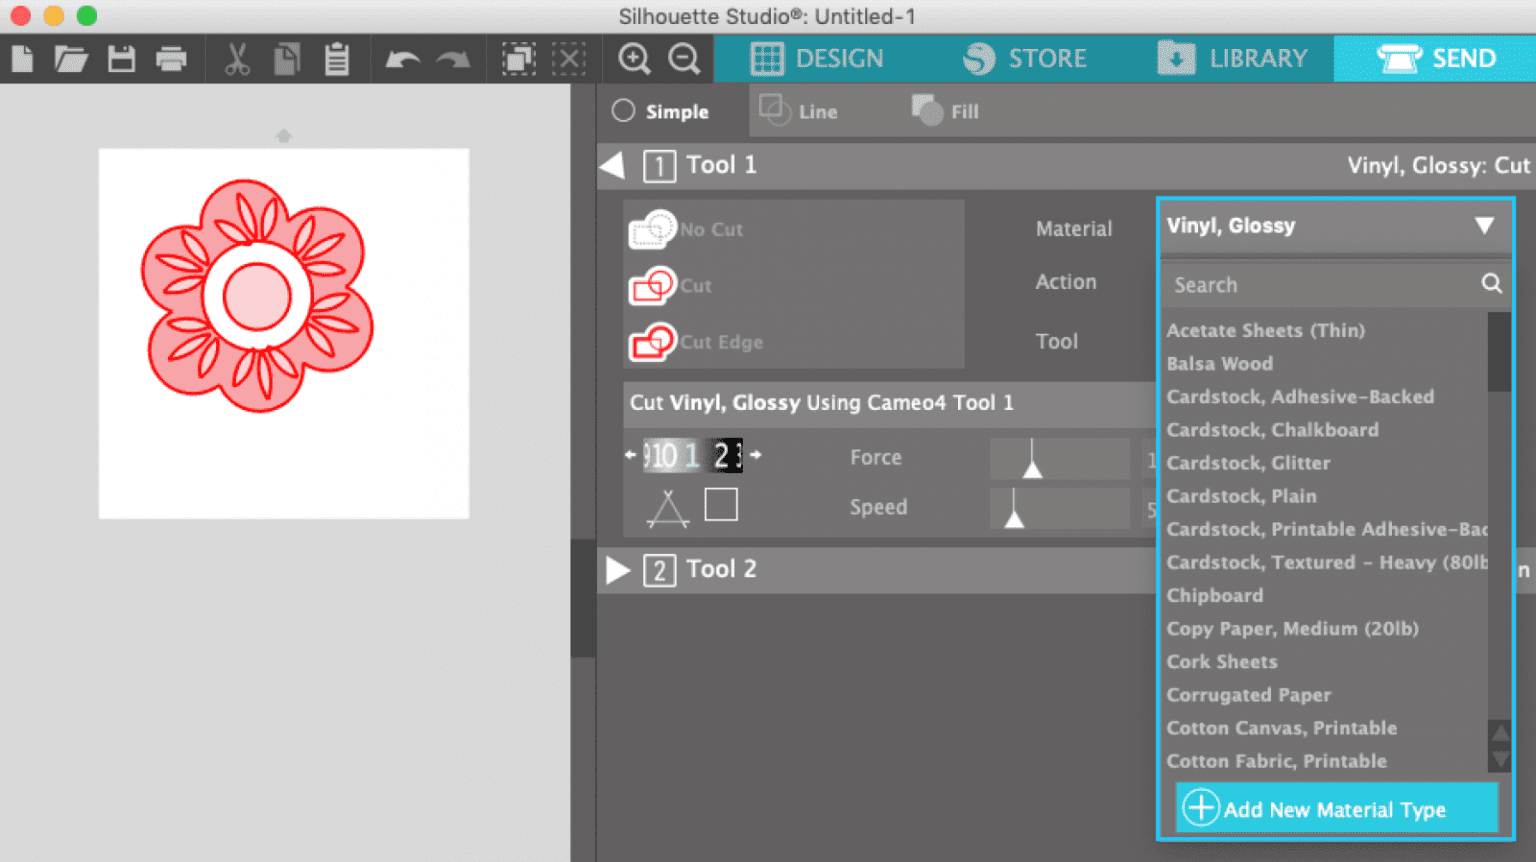
- Now, select Action and the Tool. These tools should be auto-detected. But if they are incorrect, change them from the dropdown lists.
- The cut settings change according to your material, action, and tool selections.
- If you are using a blade that needs to be adjusted manually, change it to the recommended one and insert it into the machine.
Cut By Line Or Fill
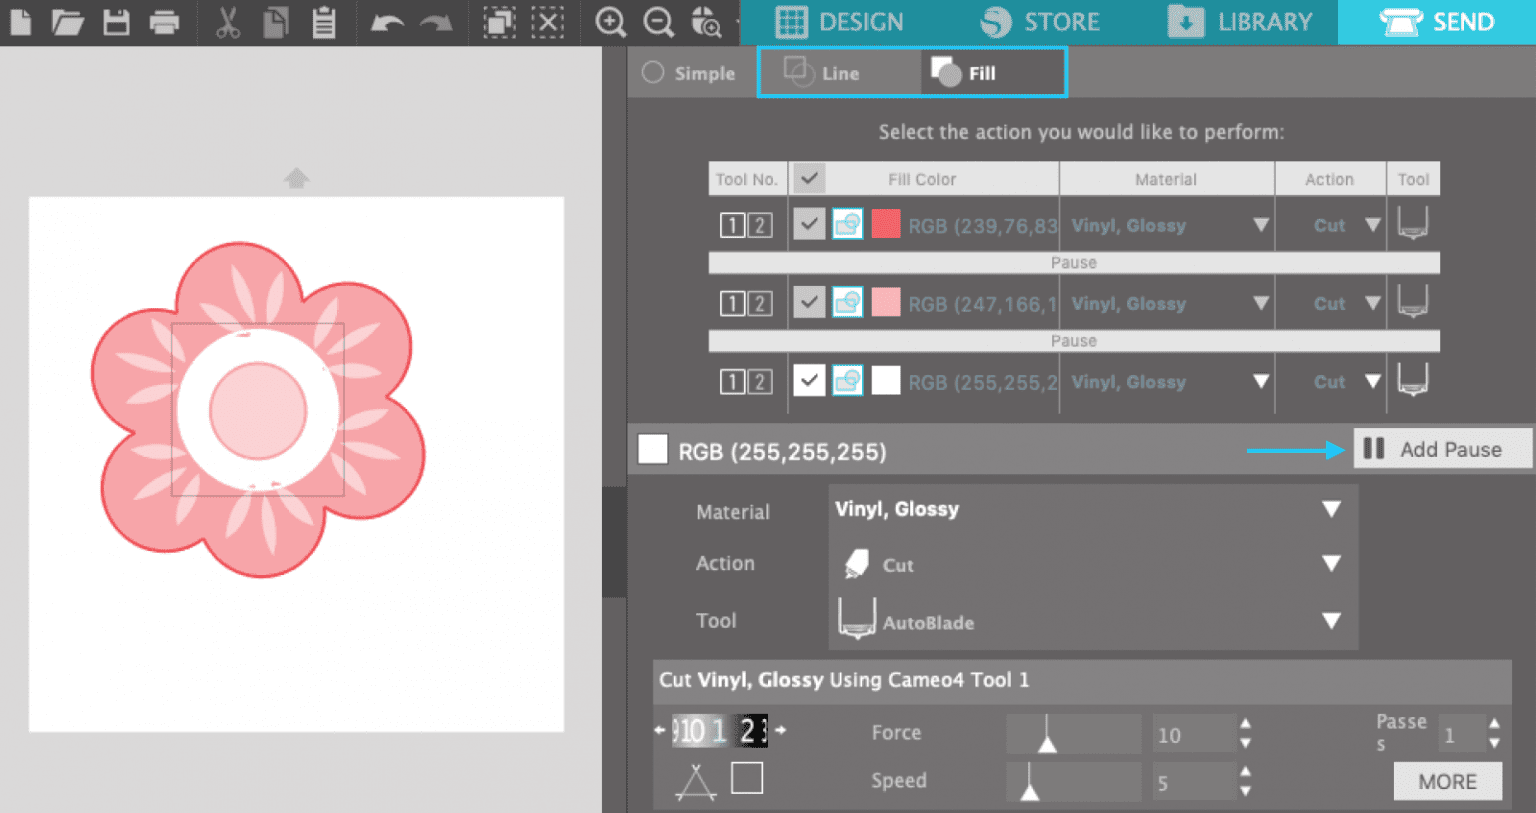
When the design uses multiple colors or types of material, you may want to cut it by line or fill it. Then, follow the given steps.
- Click on the “Fill tab” in the send panel.
- There, you’ll see each line or fill colors in the list.
- Now, check twice the materials and actions for each color.
- If you want to cut each color separately, add a pause after each color to change the material.
- Once you’ve loaded the first color into your Cameo 4 machine and started cutting, the machine will automatically pause once it finishes each color and will let you unload your material.
- When you change the color and load it into your machine, click “Resume” in the software.
- Repeat this with each color.
- If you want to cut all pieces at once, place the material on the mat to match the colors in Silhouette Studio.
Load Machine
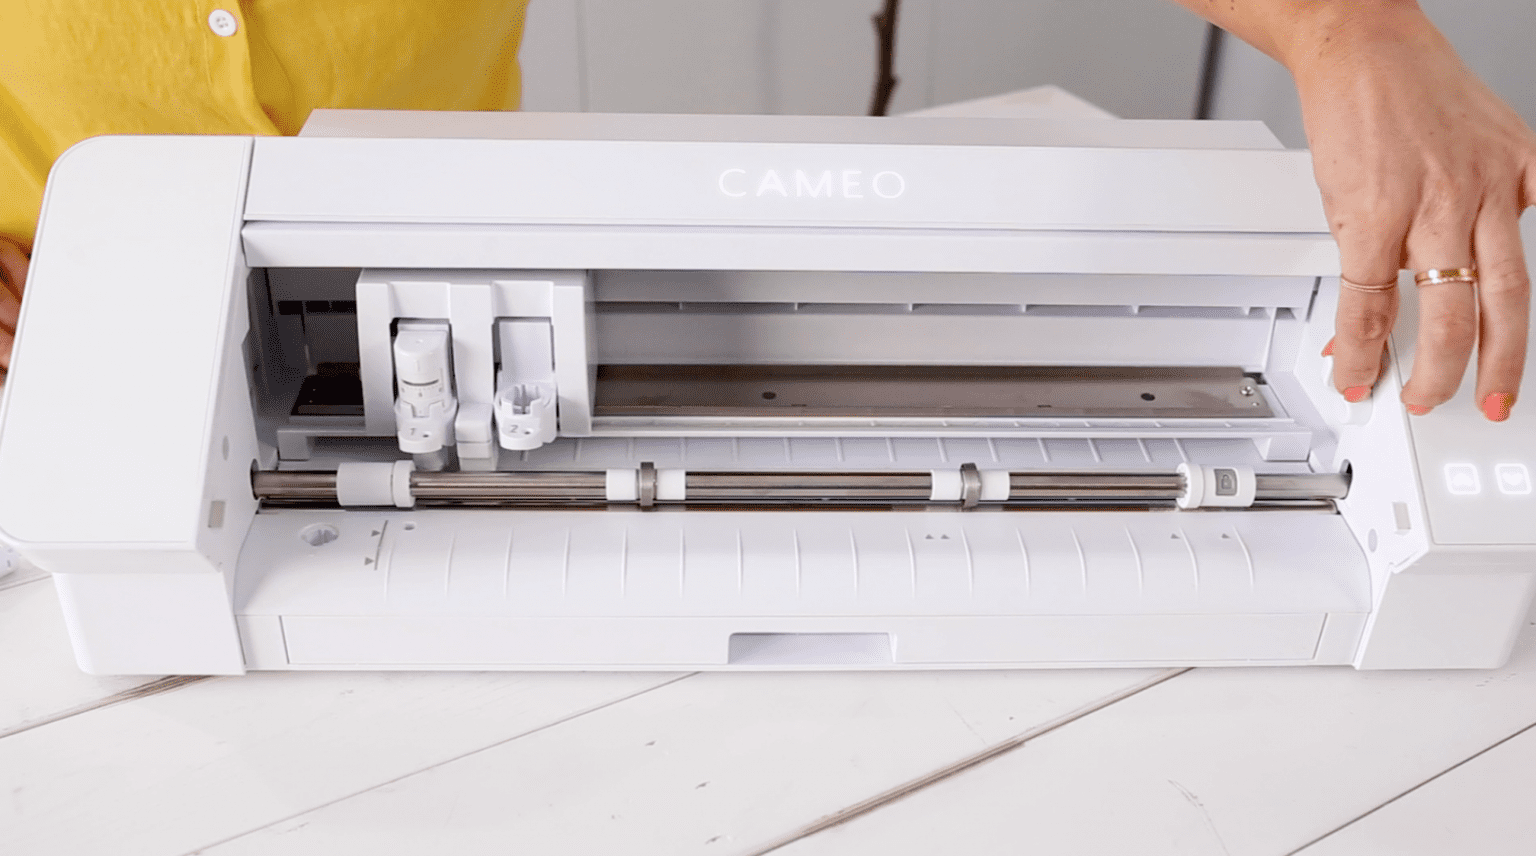
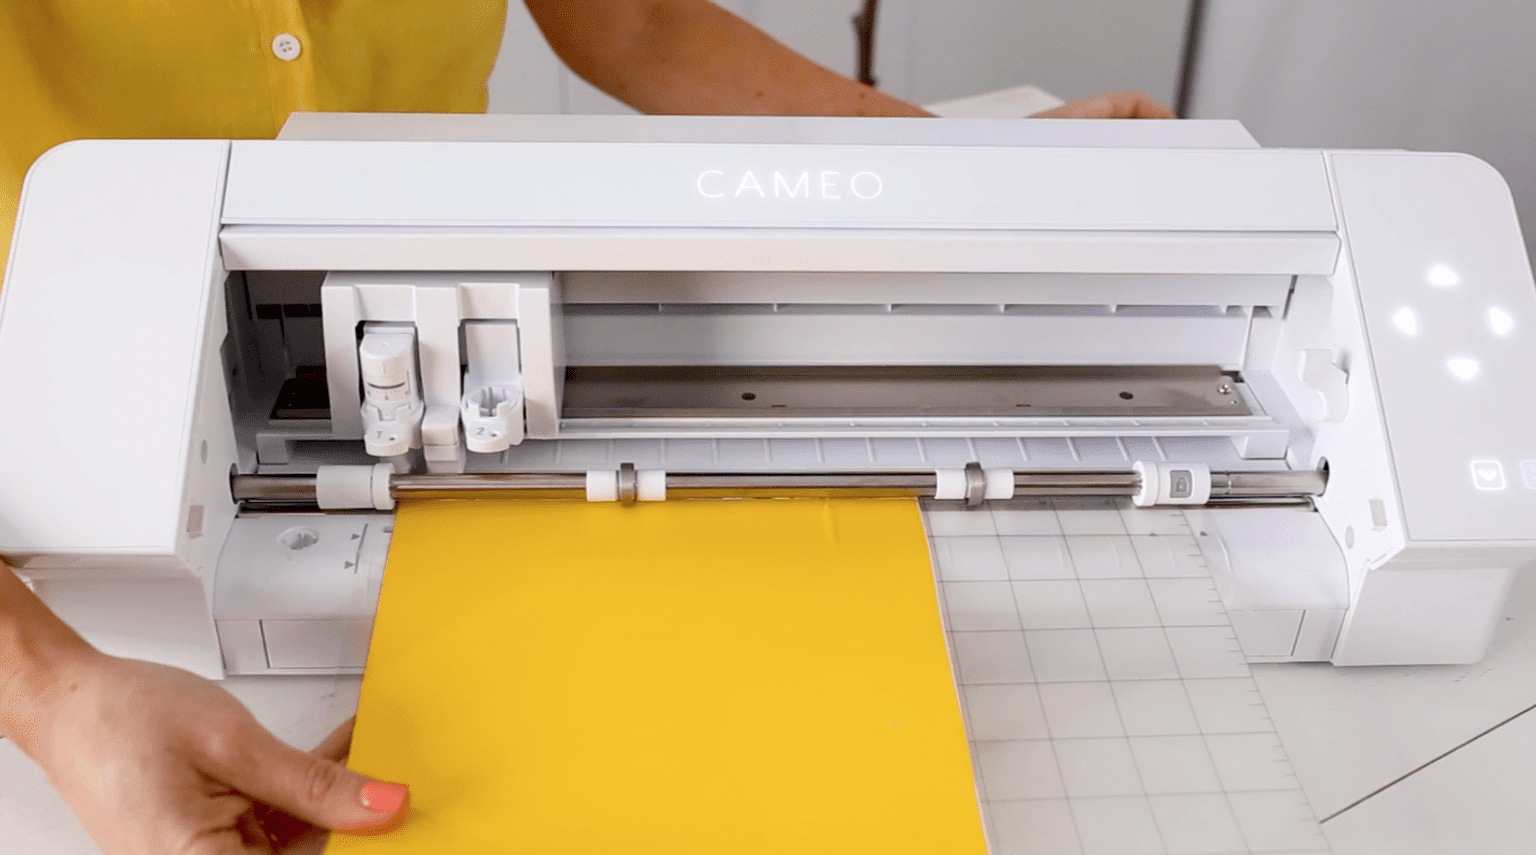
The Silhouette Cameo 4 rollers come with a 12-inch mat. However, you can adjust your rollers according to the width of the project. Also, ensure that the machine takes up the material properly for cutting. You must make adjustments by unlocking the lock lever on the right and adjusting the center rollers. And then relock the lever.
If you are using a mat, place the material on it so that it fits the grid of Silhouette Studio. Now, load the cutting mat or material, align it with the load line indicator on the left, and place it against the roller. Then, press the up/load arrow.
Send The Cut Job
Before you send the cut job on your machine, perform a test cut to ensure the settings are correct. Then, follow the given steps.
- First, click the Test button.
- The machine will cut little squares and triangles in the top corner.
- Then, unload your material and alter the settings if required.
- Lastly, reload the machine.
- Click the Send button to start the cut job.
- Once the cut job is finished, tap the down/unload arrow.
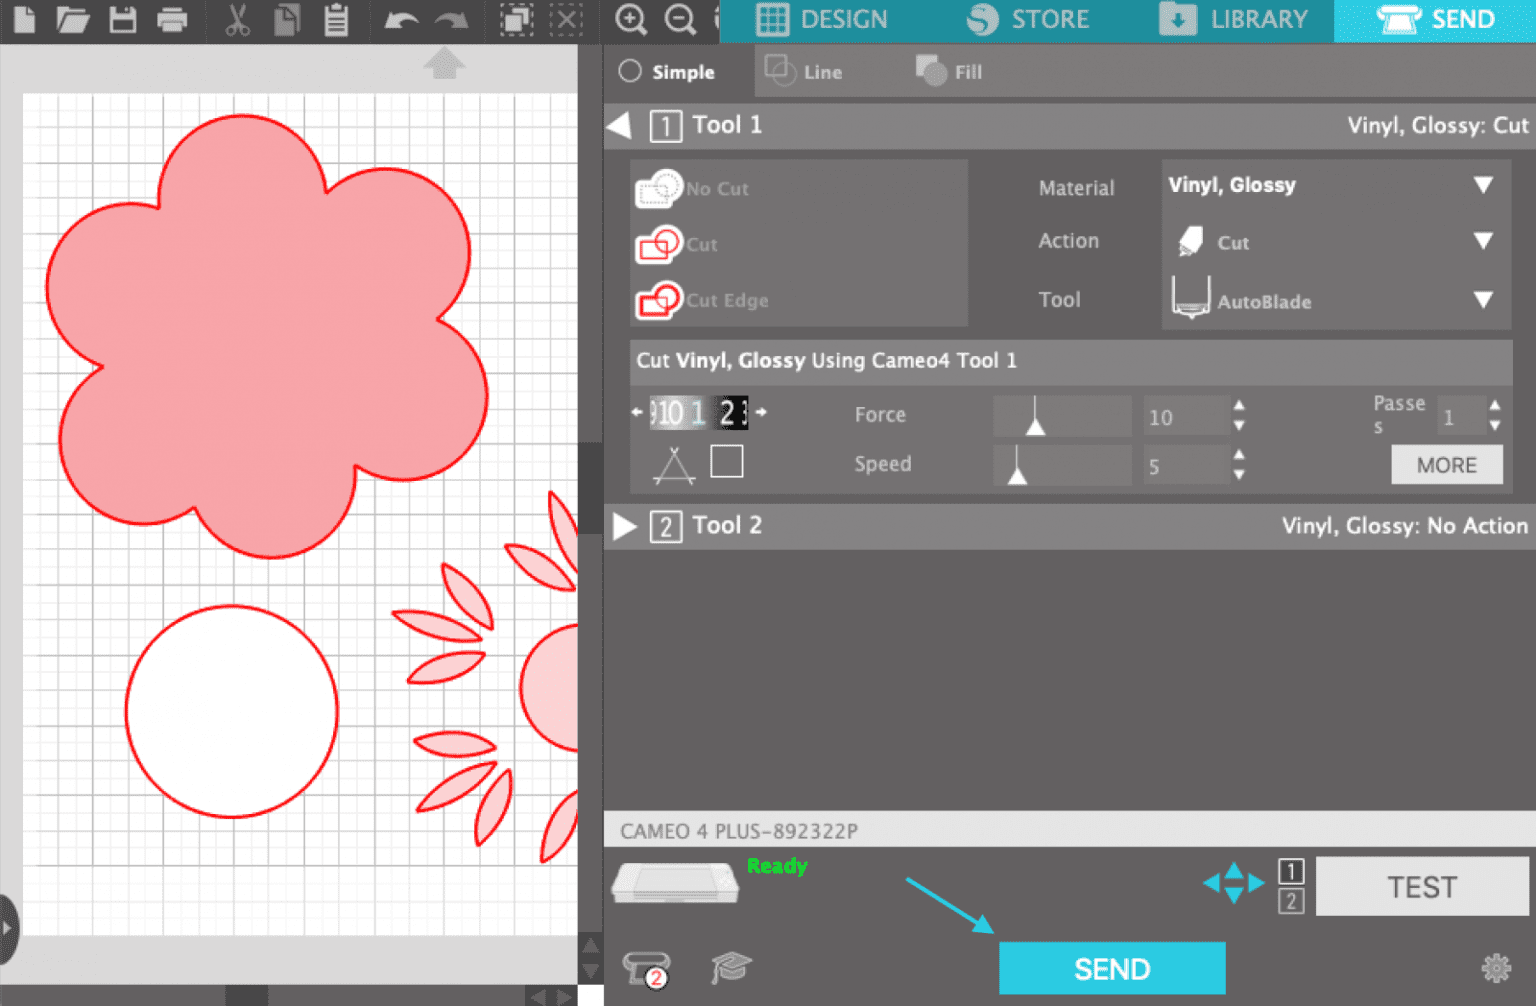
- Now, it’s time to apply the cut materials to the surface.
How To Cut Fabric On Silhouette Cameo 4?
The steps are similar to the above section – how to cut on Silhouette Cameo 4.
Prepare Your Rotatory Blade

When you open the new rotatory blade, you need to twist down the safety cap and collars that cover your blade. The blades are usually packaged with a safety cap to protect them. Hence, to make your blades ready to cut fabric, twist the safety cap down to flush it with the plastic body exposing the rotatory blade.

Then, insert the rotary blade into the respective carriage of your Cameo 4 machine. Thereafter, push it in to lock the rotary blades in place.

Load The Fabric On Cutting Mat

It’s recommended to use a strong tack-cutting mat. It helps your material to keep in place while cutting down. Take some time to make your fabric smoothly placed onto your mat by removing wrinkles, stray threads, and little bumps that may affect the cutting. It’s good to use a brayer.
Adjust Cut Settings

Open the Send menu in the Silhouette Studio software when your design is complete. The design will be outlined in red as it has default cutting with tool 1. Then, click the arrow next to “Tool 2” to open the tool 2 setting.
Ensure that your design is selected, and then click on Rotary Cut. Now, you can see that the cut lines or your design will turn blue to show that Tool 2 settings will cut it. Your design will also get extra lines or loops around the design. The extra cuts will make rotary blades give you a precise cut. At last, ensure that all the blue cut lines are within the cuttable area. Then, choose the fabric you’re cutting from the material menu and select a rotary blade from the tool menu.
Send Cut Job To Machine
Always take a test cut to check if the cut settings are accurate. If you find something that needs to be changed, adjust it from the settings. Adjusting the force and speed settings will help you get a perfect cut.

Once you are satisfied with your test cut, click on Send, and your machine will take the command to give you a precise cut. After the cut job, ensure to remove the extra fabric pieces.


Comments
Post a Comment